Showing posts with label DIY. Show all posts

Monday, July 11, 2022

Design Wall Monday--Bookshelf Quilt

 Design Wall Monday--see more great quilty things on Judy's Small Quilts and Doll Quilts blog. 

I have long wanted a design wall, but not a permanent one. Previously I had used a flannel backed tablecloth hung on the wall in my first sewing room in an upstairs bedroom.  It worked well, but in the open former family room where I am now, I needed it to be easily put away. Years ago at a quilt show I had bought a Hangit-Dangit quilt hanger and felt that was my best option for a temporary design wall.  Surprisingly, finding a decent quality flannel-backed tablecloth took a three store search.  I was not able to find a solid colored one, but for $3 at Big Lots, I found one with a white background. 


It is a pretty busy print with the bicycles and phrases, but I went forward with my efforts. I held it up to the wall to determine how much to fold over to keep it off the floor. Duct tape worked great to make the "hanging sleeve".  The HangIt DangIt is a telescoping rod with a plastic hanger that snaps over the center. 


I also put duct tape over the center of the design wall where I cut a slit for the hanger.  One nail pounded in, and it was ready to try out.

I threw up a few blocks to see if they held.  Ta-da!  It worked great.  The main reason I wanted a design wall was for the bookshelf quilt project for my niece, Emma, that stalled out.  

The brown strips are the shelves--cut full WOF, which is the size limit I settled on for this project.  I worked many hours on adding more details and playing in the scrap bins. 


Lots of fun!  For the cherries embroidery on the second shelf, I am thinking it would be fun to make it  sit on an easel.  I will also add some other objects, bookends and maybe a mini quilt or other art object.  There will be five shelves so I have lots more scraps to incorporate.  The pieces are in no particular order now.  I see an oops block to fix that has the black background on the bottom instead of the top! Many many more book pieces are needed as these will shrink when sewn together, of course. I've pinned some great ideas on Pinterest.  So glad to be making progress again!

Saturday, August 15, 2020

Reminiscing and Stitching

I have been looking back on my years of blogging, enjoying old posts and missing some of the early commenters and friends who were so encouraging to a newby blogger, and thankful for the many who still visit and share!  10 years ago I was moving out of the first dedicated sewing room I had, when our older daughter moved out, our younger daughter changed bedrooms, and our son moved back in.  


Back to the downstairs family room, and sharing it with my husband's music equipment--he was deep into playing in a band in those days. Can you believe how much we crammed in?  I had no fabric downstairs at that time, other than the project boxes in the Hoosier.


 At that point I was still using my husband's childhood metal desk for sewing and waiting on a big, very exciting delivery--no, not the baby kind, the furniture kind. 

Here Nick is earning his keep by helping put together my new sewing desk, a Bertha by Arrow Cabinets, which has seen so many creations travel across its top over the last decade.  Recently big cracks developed in two of the plastic drawer door bins.  Replacements are pretty expensive, mostly due to shipping costs, but after 10 years and no problems with this desk I will fork over the $40--after a bit of a balk!  I shared my first sewing days on the new desk HERE.  How time flies...now I'm working on cushion covers for a glider for Nick's wife Ashley, as they will hold their son by end of next week after a scheduled C-section. Baby did not turn on his own and an external version was unsuccessful. Dad and Mom get to stay in the hospital together with baby for three days after delivery.  I think that's wonderful.

The yellowed cotton fabric definitely needed replacing.  Ashley chose this nice patterned one--I had had her buy a shower curtain to use as they come in lots of patterns, the fabric is wide, and many are pretty inexpensive. This one is a looser weave due to some polyester content so I am lining the pieces.

I'll also be sewing up some PeePee Teepees this week.  Baby boys, you know!  Wish I'd had some way back when...:)

Monday, November 21, 2016

Design Wall Monday

Nearly Thanksgiving--my favorite holiday!  My design wall has two turkeys, for two nieces, this Design Wall Monday.

Emma's turkey, Thomas, is all ready to go to his new home.  I bound it in a dark purple Thimbleberries print from stash.  

Hannah's turkey, Tomasu (she loves all things Japanese), is pieced, backing and binding are made, just awaiting sandwiching and quilting.  Hopefully I'll get the quilting completed tomorrow night, maybe even finish it off with the binding.  It is surprising how much binding it takes--about 80" of binding was required for each 16x18 little quilt.  It has been fun to see what the young ladies chose and I hope they will enjoy their patchwork turkeys for years to come.  (The original pattern is "Give Thanks" from The Quilted Basket, and I purchased it at Helen's Hen House in Missouri in 2012). 

See more Design Walls on Judy's Patchwork Times. 

 I've also been spending time with an embroidery UFO, this is Poinsettias and Pomegranates.  I find I cannot work too long on the 32 count linen without my vision going blurry.  I did finish all the pomegranate blossoms in between coughing and sneezing attacks that kept me home from work the other afternoon.


I'm pleased with it so far. There are a border, corner blossoms and a basket to complete for this pincushion pattern.  I may just decide to frame it instead. 

Our long-delayed baseboard project is complete at last.  DH Grant and I spent an hour or two prepping and painting Saturday morning doing touchup and final coat of paint (this pic was of the install and not the final look). We are expecting 21 for Thanksgiving dinner and can't wait to show them off.  Naturally, now I want the baseboards redone in the rest of the downstairs to match, and fresh paint in the sewing room and kitchen, etc etc.  The home improvement list never ends!


Wednesday, March 11, 2015

TeePee for Cove

My daughter Elaine began sending me pictures of TeePees a month or two before Cove's first birthday.  She wanted a camping theme for his party and wondered if I could make one.  I agreed, and began looking around for a pattern.  There were a bunch of different tutorials on the web too, and I found one I liked a lot from Pink Toes and Power Tools.  There were clear instructions for materials, do's and don'ts, and it was a good size.  I especially liked that there were seam finishing instructions, something that doesn't always appear in the "make this in one hour"- type tutorials. I wanted this teepee to last!  Many folks who had made one of the teepees had left good suggestions in the comments, too. 

Piecing together tissue paper, drawing and cutting out the patterns, laying them out on the fabric and cutting the fabric took about the amount of  time expected, about 2 hours. Add onto that about 2 hours of first spraying and ironing the 5.5 yards canvas duck I foolishly chose to wash before use, and I was multiple hours into the project before I sewed a stitch. But I've always been a pre-washer!

I did a dry run of the crucial front flap sections before sewing.  I used a larger needle, a size 90/14 sharp, with my favorite Gutterman 50wt cotton thread for all the stitching. After all the curves I've been sewing on the Winding Ways blocks, it was a nice change to only sew straight seams :).  The front went together easily and then I followed the directions and hemmed the tops of all four sides, laid them out to make sure they were all the same length, and hemmed the bottoms of the panels.

For the sleeves to hold the teepee poles, I chose this striped outdoor fabric.  Fun, right? The sleeve was sandwiched between the side pieces before sewing.  Overcasting/zig-zag stitching was especially important on this fabric due to its tendency to ravel easily.  After looking at the blog comments I had decided to finish off all my other inside seams with double-fold seam tape for a cleaner look. Rummaging through my supplies, I came up with packages of different colored seam tape dating back to 1973, 1980, and 1986!  Great way to use it up and add more color to the project. 

 
 I made tiebacks by folding  a good length of the 1/2" seam tape in half and stitching, then inserting it to hang down inside and outside the front panel flaps before sewing the sleeves on. 

Here's the whole teepee laid out on the floor.  All the seam finishing meant more time spent pulling and tugging on that heavy canvas, but I did manage to finish this teepee in one day.  Although the tutorial called for plastic pipe, I bought six foot 3/4" wooden dowels at Home Depot and some leather shoelaces at Target to use for the poles and lacing.  My son-in-law drilled holes a few inches from one end, as directed in the tutorial, to feed the laces through. 


Here it is set up in their dining room.  Cove loved it...he's inside it there...
...and popping out!  He is just small enough now to run in and out without ducking and did so numerous times on the first dry run of the teepee.  It stands about five feet tall.  The sleeves do have a tendency to slide down, and in the future we may want to add some buttonholes or grommets to the top of the side panels and lace it to the poles to keep it from sliding down. 


On party day, they had it all set up as a playroom for the kids, but the adults liked it too!  I had to take this photo of their friend lying in the teepee :).  Sorry the glare from a window distorts it a bit.

Saturday, May 3, 2014

Random Bits and Bobs

There was no action in the sewing room this week, save for Monday night's mad rush tidy-up before the housecleaners came for their once a month visit (a small luxury we can't give up!).  You've probably all heard about California's heat wave and it was pretty miserable here, especially at night since we have no air conditioning. Ugh. Today the high is a lot lower and some moisture is gradually returning, thank goodness!

 To match the post title, here are a few random shots from the week:

Bus commute photo of the Channel Islands.  The ocean was so dark, as the sun had only risen enough over the mountains to light up the islands.  I liked the contrast and all the different blues. Gazing at this view is the best part of riding the bus.


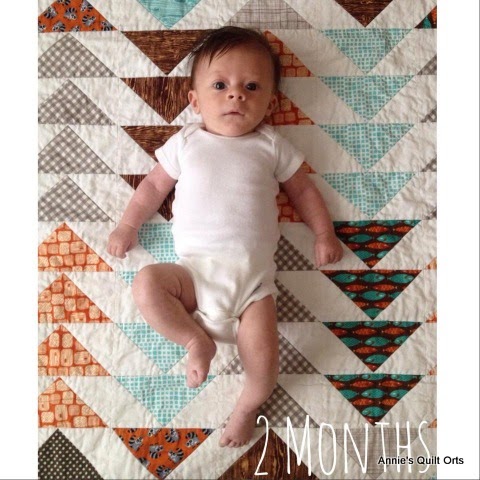
Dear Grandson Cove turned two months old on 4/26.  He's gained two pounds and an inch and a half in the last month.  I love that my daughter is using the quilt I made for him as her backdrop in monthly growth shots.


There was a face on my English muffin Grant made me this morning.  I had to take a quick shot before the eyes melted.

After breakfast I planned to get to the spray basting of the baby quilt-as-you-go.  Good thing I double checked the batting size, it was too small!  So I had to cut another and lay out the longest strip to confirm.  All good now!  The batting is now resting.

This birdie is front and center.  I'm waiting for my sister to arrive and help me, since she has spray basted before and I have not. There will be sewing today, at some point!  I should do some cutting while it cures.

Blog surfing led me to check out this fantastic DIY ladder/succulent project on the blog Sugar & Cloth.  What caught my eye is the "ladder".  It is a section of premade pressure treated railing from Home Depot that she stained and sealed.  My first thought was what a great quilt ladder it would make.  I checked the price of the 6 foot section: it is only $32!  Unfortunately, it is not sold at my local store, but I may be looking around for something similar. 

Finally, I got a lovely thank you card from the Doll Quilt Swap partner I sent my Churn Dash doll quilt to, Regina in Ohio.  She loved it and I'm pleased she did.  Lori has a linky party for the swap and there are some wonderful examples HERE. Neither of the swappers I gave to/received from have blogs, so I posted the link from my wrap-up that had both quilts. 

Happy Saturday!

Design Wall Monday--Catching Up

 Design Wall Monday --See more design walls on Judy's Small Quilts and Doll Quilts blog.  I disappeared for awhile, due to computer issu...