Showing posts with label precuts. Show all posts

Monday, June 12, 2023

Design Wall Monday--Fixing Meadowland

 Design Wall Monday--see more great quilty things on Judy's Small Quilts and Doll Quilts blog. 

A  problem quilt has been hogging space in the sewing room for months--my Christmas print version of Then Came June's Meadowland quilt.  In December I had done some free motion quilting of motifs with freezer paper, and then attempted a candy cane in the rectangles along the edges of the quilt, which bombed.  The quilt was in time out and taking up space since then.  I finally got sick of looking at it and revisited the issues. The main one was that I had a LOT of threads to bury. 


This pic is before I had blotted away most of the blue marking pen.  


It took quite a lot of time to get all those thread tails buried! After inspecting the quilt post a rinse and dry, I opted to leave the corners and side rectangles unquilted. 

If I change my mind, something can always be added.  I have a few missed spots catching  the binding to mend too. The project box turned out to have extra block pieces I didn't remember were there.


The corner squares were neutral in the quilt pattern (I changed them to one big square for my quilt construction row style), but for this single block I cut squares of leftover We Whisk You a Merry Christmas prints.  Such a fun fabric line.  I won the stack of fat quarters at Sewtopia a few years ago. 


There are also a lot of leftovers from the other fat quarters in this line to play with later.  Glad to have another Christmas quilt to enjoy next season. 

Monday, April 10, 2023

Design Wall Monday--Plaidish2 Progress

 Design Wall Monday--see more design wall beauties on Judy's Small Quilts and Doll Quilts blog. 

I got the final two rows attached to the Plaidish2 quilt top.  


This is a big quilt already, and will grow another few inches in each direction after the outer borders are added.  I spent a couple of hours cutting up colors from my precut 2.5" scrap drawer, which is completely full!  The outer border is assembled in groupings, so lots of mixing and matching will be happening.  


I love using my rotating Omnigrid mat and a small rotary cutter for trimming jobs like this.  


Caught a couple of crows that landed in the backyard--very unusual to see them here.  I watch flocks of them head inland almost every evening, but they don't often stop!  Our hills and lawns are still very green from all the wet weather these past couple of months, though the snow on the local mountains has melted. My favorite volunteer flowers did bloom recently, after a several year absence due to the drought. 


This patch is below the bridge I pass over every day on my way to work.  So pretty. 


I'd say these flower spikes were about 18-20" tall.  Lots of poppies in bloom in different areas, too, including my small backyard patch.  The garden centers have been crowded with folks putting in spring plantings.  I have avoided going on the weekends but plan to get some flowers soon. 

Saturday, April 8, 2023

Sewing, Quilting, Binding

I've spent a lot of time recently sewing, quilting and binding--If only those activities worked off more calories!  
First up, a baby quilt that has been waiting for the already-made binding to be attached and finished. 


Entirely from stash, with a lot of pink fat quarters pulled from the fat quarter drawer. Many of the black and white prints were leftover from the baby quilt I made our now 7 year old grandson. 


The monkey print was also from that baby quilt.  The gray print was leftover from another quilt back as well. Using it up!  I had the measuring tape print awhile too--I thought it was fun for a baby quilt. 


The "Make the Connection" charity quilt was also finished with a white print binding, but this pic is only of the finished top.  Free pattern on American Patchwork and Quilting magazine website, by Jo Kramer. My sister and I are rejoining our local Modern guild and I will donate these two. 

While looking for something else in the Hoosier Cabinet, I pulled out the project box with the Plaidish2 blocks.  The A and B block components were all finished last Fall and I had  sewn together  just a couple of rows.  I think this got abandoned for Sewtopia prep. 


A and B block sewn together. 


As of dinnertime tonight, all these rows are together.  Two more rows to add before the center is done.  I did not cut any of the outer row C blocks yet, wanting to avoid too many repeat fabrics.  The Plaidish and Plaidish2 patterns are free on Kitchen Table Quilting. She has a lot of Freebie tutorial patterns. 

Next project to cut and sew up is a baby quilt for our next grandson, due in a couple of months.  I have a plan and fabric selected.  More on that later...

Monday, January 23, 2023

Design Wall Monday--Accidental Squirrel

Design Wall Monday--see more great projects on Judy's Small Quilts and Doll Quilts blog. 

While hubby was off golfing on Sunday, I poked around my small projects drawer and the precut squares and strip drawers for entertainment.  There were some brown/white HSTs that looked like a good starting point.  Soon I was pulling more browns and neutrals, cutting up more scraps to make HSTs. 


A pattern soon showed up, though it seemed to take all afternoon to get to this point!  Finding enough of one brown scrap/partial fat quarter to cut matching 4" squares  for the HSTs was the first hurdle.  Initially I was going to make only three blocks...


Then I made three more, and included the blue print. That led to needing another row to make a more cohesive scrappy quilt. Improv is hard!  I do better when there is some commonality; in this case, cheddar centers with the four brown squares, and creamy yellowy prints with red centers for the simple churn dash blocks.  


Lots of auditioning, trimming, refolding and reorganizing.  It was good to poke into the fat quarter dresser, but a colorful squirrel showed up, too!

While at Sewtopia Palm  Springs last November, I bought a curated fat quarter stack  at the in-event shop, in colors foreign to most of my stash.  They have been in a wire bin on top of the fat quarter dresser, so I  see them frequently.  I decided to find a fat quarter friendly pattern among my library.  Several options were narrowed down to the Livin Large pattern booklet by Heather Mulder Peterson--seems she's my favorite designer recently--having just finished the bindings on two runners from another booklet of hers :)  

The pattern I was drawn to is on the back of the booklet, Pretty in Pink, and required additional fat quarters for the throw size, meaning many auditions from the stash drawers. The curated fat quarter bundle is the top group in this photo.


Pink and blue are not colors I have much of, but I did find some sweet coral options and a repro blue print that blended. The pattern also can be cut from 10" squares. I likely will not add the applique, but we'll see!  The bolt of Kona Snow I bought last year still has plenty of fabric on it, which I will use for the narrow sashing. Nice to have all the fabric I need for this on hand!  

Thursday, January 12, 2023

Backings and Bindings Continue

 In the neverending queue of tops that need to be turned into quilts, I chose two small ones to work on. They are fairly young projects in my TBQ pile.  


I had already chosen the solid aqua--I think this is Kona Pool, but don't quote me. The binding is made from a fat quarter.  Always patting myself on the back when the stash provides, lol!


Leftover backing cutoffs provided the fabric for Winding Roads mini.  These patterns are by Heather Mulder Peterson from her booklet Mini Charms 2. I made the basket block last year from this booklet.  It is still gracing the wall but I will find a backing/binding for it too. It looks yellowish here but is white IRL.


Okay, off to get ready for work!

Monday, January 9, 2023

Design Wall Monday--Scrappy Small Quilts

 Design Wall Monday--see more design walls on Judy's Small Quilts and Doll Quilts blog. 

I played with little quilts all weekend! On Saturday my husband was picked up by our son to play golf in Ojai, so I had hours at home to myself.  I started with the the newest mini quilt I showed last time, first choosing a backing fabric from several options. 


A vintage yellow gingham, a small flower red print, and a plaid fat quarter were my top stash options. The HSTs were made from a vintage green print  from stash, and a mini charm pack of Cheeky by Urban Chiks that I probably got at Sewtopia.


It was a close race, but the plaid Denyse Schmidt won out, as it echoed the plaids in the mini. 


After hand stitching closed the stitch-and-turn opening, the faux binding technique  was the next concern--could I quilt around the edge and make my idea of  putting faux binding strips on the backing work? (technique found on the Crafti Staci website, for coasters). 


I was pretty pleased that the stitching mostly stayed where I wanted it, to create the binding look!  A few lines of ditch-stitching down the center and the quilt was finished. 


All done!  

The next mini quilt was also made from leftovers. 

The pinwheels were made from fabrics in the Greenpiece quilt kits from  the Fat Quarter Shop in 2009, I think!  I had saved all the fabric leftovers from the monthly kits and easily cobbled together a backing for the pinwheels.   The Greenpiece quilt top was finally finished in 2021, but still needs  a backing and to be sent out for custom quilting! 

Monday, December 12, 2022

Design Wall Monday--Mug Mat Pallooza

 Design Wall Monday---see more great projects on Judy's Small Quilts and Doll Quilts blog. 

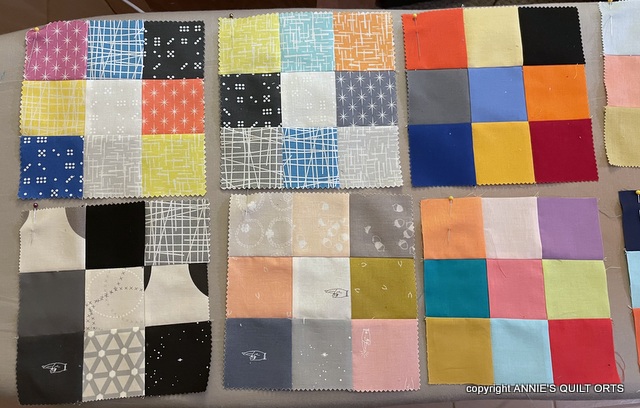
I was scrolling on Pinterest recently for quick gift projects and came across a Coaster pattern by Crafty Staci.  This was for a small mug mag with a faux binding technique.  I've made other projects by this designer/crafter and like her easy directions and tips for her projects. Though she made hers with 2 1/4" squares, I wanted to utilize  2 1/2" charm packs I've acquired, mostly through gift baskets, etc.  I also wanted to upsize the size to a snack mat size. 

I decided to use 9 squares for each mat. 

What fun I had laying all these out and playing with color.  Easy row sewing for assembly.  The pattern calls for 1" wide strips all around; this forms the "binding" when the mat is assembled and ditch quilted. 

Initially I was pulling 1.5" strips from my scrap drawer system to trim down for the narrow borders, but switched to 2" strips for more mileage out of each strip length, since they could be sliced in half lengthwise for the 1" wide border pieces. Lots of backing squares were also cut from scraps and fat quarters.  I sewed up the first couple of mats...

The mats have batting as well as Insulbrite per the instructions, so are pretty thick.  I left the top right mat unquilted except for the faux binding, and on the black/gray/white one I added quilting just around the  center square.  Many of the mats are intended for my workmates. I did want to try the 4 patch size too, and used Christmas charms.  There is a little hand sewing closing the opening after assembling and turning the right side out, but otherwise lots of fun piecing. I've also sewn together  some of the remaining Christmas charms for a larger hot pad.  I'll cut up all the Insulbrite I have on hand to finish all these, no doubt!

Wednesday, November 16, 2022

Sewtopia Palm Springs, Part 4

Sewtopia project #2 was a tablerunner, a cropped portion of the Beachside Bungalow quilt by Kim Brackett, in her Scrap Basket Beauties book.  I had all the block pieces cut and ready to sew.  I needed my husband's help to take a photo of the layout directions in the book, as I had only written down my changes on a piece of paper.  Eventually he got back to me after golfing! By that time I had finished all the blocks. 


Very scrappy but fun.  Most of the fabrics were from a JoAnn's store jelly roll, with some additions from stash.


The "corner" blocks alternated with a "twist" block. There was no further assembly as I will have to figure the  the setting triangle size for the sides.  I am glad all the center pieces got sewn, anyway!

My third project was the Four-patch X by Bonnie Hunter, but I was only able to get one block completed before the end of the last day.  

The pillow cover I made did not win the Windham challenge; I am not sure who won!  The winner was chosen when I was busy elsewhere, I suppose.

There was a great trunk show from Latifah Saafir as well, with lots of HRTs.  She was selling her new HuRTy ruler afterwards. 

Sewtopia swap gifts were on the tables in the morning.  I received a very clever zippered folding tray with goodies inside. 


When opened, it was full of loot. 


A needle minder, needle book, needle setting tool, magnetic pin holder, and mini charm pack.  Thanks, Mandy!


Look at all the Sewtopia loot given and some I took home after we played games.  I did buy the strawberry print yardage and couple of fat quarters in the Sewtopia shop.  


An ironing board cover and several bottles of Soak spray, with a Kona color book were also gifted. 

Finally, I got a couple of birthday gifts, since mine fell during Sewtopia. My sister made me an H-bag. 


Love the sewing theme and the Lucite handles. Kathy cut up and covered used campaign signs for  a sturdy base inside the bag.  Our sister-in-law gave me a beautiful lipstick holder and thread winder butterflies. 


Finally, next year's Sewtopia was announced as NASHVILLE, TN!  I have never been to Tennessee.  Kathy is excited as her daughter and friends from Missouri.can easily visit.  We look forward to another great time put on by Amy and her SEWtopia crew!

Wednesday, November 9, 2022

Sewtopia Prep

Hi there!  It has been a busy few weeks.  I will have to travel back in time to fill in all the fabric and fun leading up to and during Sewtopia Palm Springs.  I previously showed all the fabrics for the first of three projects I planned to work on during the retreat, which was the Sidewalk Chalk pattern by Meghan Buchanan.  Cutting was a little stressful given that I was using color groups rather than single fabrics, but I was so happy to pull from stash. 

Blue fabrics are limited in my stash, but I found a good mix of print, scale, and tone. 


This late night pic of the greens turned one of them brown. 


Reds, yellows and peaches rounded out the groupings. I prewashed all the pieces to prevent running colors...look at the sink with the reds!


It required a number of rounds of soaking and rinsing before the water was clear. 


I also did a lot of cutting and sewing for a secret birthday gift for my sister, as her birthday fell during Sewtopia. 


Kathy loves blues so I put those in the middle.  Most of the pieces were cut from 5" charm squares. I used two different white on white prints for fun. The pattern I bought from a speaker at guild a few years ago. 


As you can see, I chose to do only one row and make a tablerunner size of the Mini Spikey pattern. While I got the binding sewn on by machine, I had to finish hand-sewing it down while at Sewtopia. The border and binding are Kona Navy, which is near black, it is so dark!


I participated in the general Sewtopia blind swap; I made this reuseable gift bag and filled it with a few fat quarters, a pattern, and other goodies. This is about 9" tall in real life.  I put it in another gift bag and added a notebook sized graph paper book as well. 

We were able to be less choosy about how much to bring to Sewtopia  since we were driving;  I brought my own sewing machine.  The drive was not short, but everything went pretty smoothly through LA and we got to the Margaritaville Resort in good time.  As we walked into the lobby, our brother was at the desk checking in his wife!  Too funny.  This was Laura's first Sewtopia, and she brought her  brand new machine, a fancy Quilter's Edition Bernina.  More about that later....

Our 3rd floor room overlooked the pool...


I caught a UFO cloud near sunset :)  It was nice to be settled into the hotel before the big event started the next day. More about that in the next post!

Design Wall Monday--Catching Up

 Design Wall Monday --See more design walls on Judy's Small Quilts and Doll Quilts blog.  I disappeared for awhile, due to computer issu...