Showing posts with label pinwheels. Show all posts

Monday, January 9, 2023

Design Wall Monday--Scrappy Small Quilts

 Design Wall Monday--see more design walls on Judy's Small Quilts and Doll Quilts blog. 

I played with little quilts all weekend! On Saturday my husband was picked up by our son to play golf in Ojai, so I had hours at home to myself.  I started with the the newest mini quilt I showed last time, first choosing a backing fabric from several options. 


A vintage yellow gingham, a small flower red print, and a plaid fat quarter were my top stash options. The HSTs were made from a vintage green print  from stash, and a mini charm pack of Cheeky by Urban Chiks that I probably got at Sewtopia.


It was a close race, but the plaid Denyse Schmidt won out, as it echoed the plaids in the mini. 


After hand stitching closed the stitch-and-turn opening, the faux binding technique  was the next concern--could I quilt around the edge and make my idea of  putting faux binding strips on the backing work? (technique found on the Crafti Staci website, for coasters). 


I was pretty pleased that the stitching mostly stayed where I wanted it, to create the binding look!  A few lines of ditch-stitching down the center and the quilt was finished. 


All done!  

The next mini quilt was also made from leftovers. 

The pinwheels were made from fabrics in the Greenpiece quilt kits from  the Fat Quarter Shop in 2009, I think!  I had saved all the fabric leftovers from the monthly kits and easily cobbled together a backing for the pinwheels.   The Greenpiece quilt top was finally finished in 2021, but still needs  a backing and to be sent out for custom quilting! 

Monday, January 17, 2022

Design Wall Monday--Summer Breeze

Design Wall Monday--see more Design Walls on Judy's Small Quilts and Doll Quilts blog. 

A lot of arm exercise these past couple of days while machine quilting the Summer Breeze quilt.  Pattern in Kim Brackett's Scrap Basket Surprises book.  All of her designs are based on 2.5" wide strips.


I stitched the seamlines between blocks and borders with the walking foot, then started quilting around the pinwheel blocks. I am so appreciative of the automatic presser foot lift on my Husqvarna machine when I have to make so many turns and stop/starts.

I could not figure out a way to continuously quilt all the seam lines in the pinwheel blocks, so did it differently in just about every one!  There are a lot of thread tails to deal with.  In the striped blocks, I decided to quilt a heart.  I did not have a quilting template but searched in my Valentine's decorations and found a perfect carboard one. It even matched the quilt's colors :)


I used a water-erasable pen to trace the heart.  After stitching around the first couple of hearts, I decided to add another line of stitching inside the heart to even out the quilting density.

 
Badly lit shot, but I just used the walking foot as my guide and didn't mark.  I'd say that's about 5/8" inside the first line of stitching.  As I moved up the rows from bottom to top, I discovered I had missed some of the ditch stitching of the rows and had to finish that up!  No harm done, and the layers didn't shift despite having no basting pins or basting spray.

The quilting is all finished.  I love all these repro 30's prints but the kittens in the blue dishes are the most adorable. 


The binding will get made and attached soon!  I'm thinking about what I want to put on the label, too.

Monday, December 27, 2021

Design Wall Monday--last of 2021

On this final Design Wall Monday of the year, a quilt top has been chosen to be finished.  See more Design Walls on Judy's Small Quilts and Doll Quilts blog. 

My younger daughter Erica has a long time friend who has been diagnosed with brain cancer, shocking for someone only in her early 30s.  Erica asked me for pics of any unclaimed quilt tops that could be finished for Stephanie.  There were a lot to choose from--one of my New Year goals is to get several sent out for quilting! 


Erica chose this bright '30s print top I finished last year.  The pattern was called Summer Breeze, from Kim Brackett's Scrap Basket Surprises book.

Lots of sweet prints in this quilt.  The medium blue print closest to the bottom is an actual vintage fabric from the 30s. The rest are repros.


There was fabric set aside for binding as well.  I ordered a 1930s print from Fat Quarter Shop, it is from the Aunt Ella's line, a sweet floral with butterflies.  Erica chose the print in orange, it is also offered in pink. 

Happy New Year, everyone! Here's to a better 2022...

Sunday, February 3, 2019

Design Wall Monday-February 4

It's Design Wall Monday again.  See more design walls on Judy's Small Quilts and Doll Quilts

Is is just me, or did January go by in a flash for everyone?  Well, maybe not those stuck in the Polar Vortex...we've been getting plenty of rain and road closures due to flooding and mud flows from all the burn areas around here.  The hills are green green green, so pretty to look at, but all the grass can become fuel for fires later. 

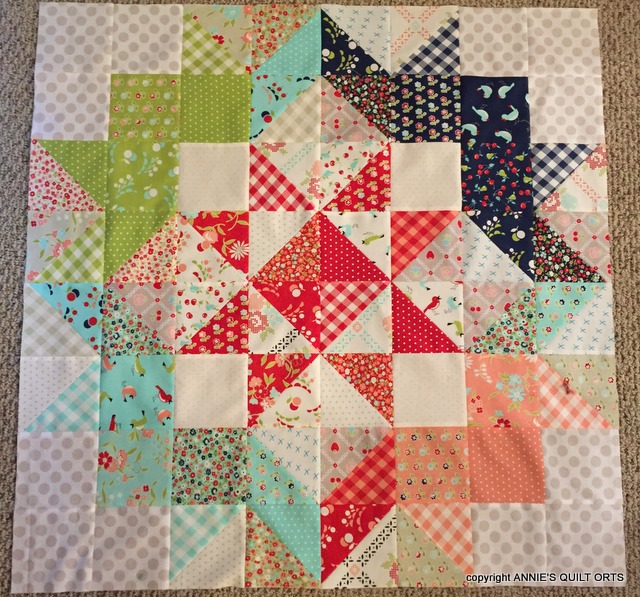
I've been mowing down projects in my sewing room, trying to add stash fabrics to anything I can. The Moda Love Quilt quiltalong is going on now, and after making a layer cake sized Love quilt last year, I have wanted to try a different size, from a hoarded Bonnie and Camille Vintage Picnic charm pack.  I spent a great deal of time pulling neutrals and stash additions for the quilt--it became abundantly clear that I tend to buy off whites and not many light print backgrounds!

The charm pack had a lot more aqua and I had to sprinkle it around some.  I tried Bonnie Hunter's "webbing the top" method but had two blocks tangle and turn on me and had to take out seven seams to get them out of the red star center.  Of course they couldn't be on the edge!  This finishes at about 32" square so is nice wall quilt size.  #modalovequilt

I played with leftovers from the QOV blocks and came up with these little paddlewheels and windmill, so fun to put together.  I'll add this to the stack of blocks to mail in.  The QOV info said that while they accept other quilts, the majority of Veterans chose a patriotic themed quilt, when given a choice.

Since passing off a baby quilt to my sister to longarm for me, I got out the next priority project box.  I bought the charm packs and background fabric for this quilt probably two years ago--it is a long overdue gift for my son-in-law's  mom and stepdad.  I chose the Falling Charms Quilt from Missouri Star Quilt Co for this grouping: 

The Maison de Provence charm packs were from Connecting Threads, as was a neutral background.   Since I only ordered two charm packs of 28 squares each, I added stash fabrics to make up the 80 blocks for the 8x10 setting I want.  There is a very good video on YouTube for the quilt.  A jelly roll works but I cut the 2.5" strips with my Accuquilt GO cutter from yardage.  The squares now all have the first background strip on, and I got a dozen or so blocks done with the L-shaped sashing.  

Meanwhile, our younger daughter dropped a bridesmaid's dress alteration onto my list.  She called around but no one could make her deadline of Wednesday to shorten the dress before she gets on a plane for a friend's wedding.  So I'll be hemming a lot of chiffon and lining.  Fussy stuff but not a fit problem.  Erica laughed when she challenged me to find a matching thread for her mauve dress and I pulled out a perfect spool from the thread bins!  Stash is a good thing...except when it gets overwhelming. 


Tuesday, September 4, 2018

Three for September, and Log Cabin Loonies

This morning I pulled out the next Three for September project, wherein I am working on one WIP for three days at a time, then switching to another.  I snagged the Garden Pinwheel flimsy from the depths of the coat closet where it has hung for an age. 

Would you look at that?   I had to laugh at the saggy plastic hanger, so pitiful!  And, hey, I already made the binding... 
...and the backing!  I have no recollection of constructing this back, but am happy to see it.  At lunch time I dug out the old plastic project box from the depths of the Hoosier cabinet. Fortunately I am in that cabinet often enough to know the fabrics I set aside for the leaves were in there. 

The quilt pattern sheet came in a magazine solicitation and that inspired the pinwheels I made.  You can see that a bias vine was part of the detail and that is where I stalled.  The Accuquilt GO cutter and Alex Anderson's Pomegranate die (which I specifically bought a few years ago for this project) were fished out after dinner, and I started adhering fabric pieces to sheets of Steam a Seam 2.  

I have not yet decided if I want the leaves to extend the length of the borders, or stop short as in the inspiration pattern.  There are lots of green scraps to cut and play with.  

Speaking of scraps, today is the link up for Log Cabin Loonies on JulieK's blog.  I am up to 20 finished blocks now. 
I've already shared this photo on Lori's Humble Quilts Facebook page, and on Instagram.  My plan is for a total of 80 blocks to made a nice couch quilt.  So fun to play with all the colors in the scrap boxes!

Three for September Report

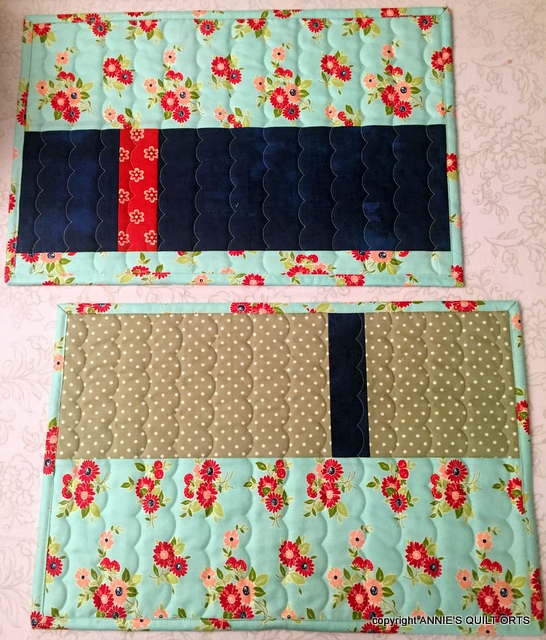
An update on this experiment, working on one project for three days and then switching to another every three days through the month of September.  I started with some placemats that were in progress and am happy to say I finished them on the third day.  In the 11th hour, but finished!  The green photographs very dull but is actually a brighter shade. 

I had just barely enough of the aqua floral binding for the four placemats.  In fact, I was short until I remembered to look in the 2.5" precut scrap drawer and found a 12" piece to add to finish the last placemat!

The back is finished to make them reversible.  My newlywed nephew and his wife hopefully will enjoy using these placemats in their apartment.  I got their address today as part of the tasks associated with the project :)

I perused the remaining list of 9 WIPs and decided on an oldie but goodie for the next three days.  It appears this poor quilt has not made an appearance on the blog since 2012.  Sheesh. It has been aging a long while in the coat closet.

I made these pinwheels with cutoffs from the Rick Rack Road quilt, way back in 2011, and made the big HSTs to form diagonal stripes.  The borders have been awaiting a detail of leaves ever since.  I have had a pile of green fabrics set aside for years, and plan to back them with fusible web and use my GO! cutter to die cut the leaves, then use a fancy stitch around the edges after fusing them on, like so:


I saw this detail on a quilt at a local guild show in 2013 and liked the impression of a vine without having to mess with bias strips.  Getting the fabrics prepped and cut into leaves is the main task.  Since I work the next three days it may be all that gets done, and I will be happy with that. 

Friday, January 25, 2013

Ups and Downer

Flitting from project to project results in a mixed bag of things to share.  First, I got the inner borders attached to the modern pinwheel quilt.


Inspector Mini approved this stage of the assembly without comment.  I'll be hunting for an outer border fabric tomorrow at the Road to California show.  I'm thinking a larger print of some sort.

It was very slow at the Shoppe today so I got the binding all stitched down on one project.  I settled on  "Toy Sink" as the name for this wall hanging made from leftovers of my Kitchen Sink quilt.  

 
Today I also finished the buttonhole stitching on all the pieces for this wool table mat that has been making the trip to the Shoppe for several weeks.
 
I purchased the Primitive Gatherings kit while in Cincinnati at the International Quilt Festival nearly two years ago.  There were supposed to be small dark squares as a third layer to this design, but when I was working on the buttonhole stitching on the plane ride home, it was so turbulent that I put away the small squares in a baggie and quickly made these giant cross-stitches through each remaining pair of squares.  I used DMC Perle cotton in size 8 in two different greens.  At first I was removing the cross-stitch but then decided I liked how it was even more primitive looking, so let it be.


This homespun from the kit has been ironed on and fray-checked per the instructions, then black thread will be added in a buttonhole stitch all the way around.  Nearly done!
 

However, for the Getting it Done challenge, as another downer in the ongoing saga of mistakes with the quilt backing for Judy's Mystery Quilt, I removed the SIDE border instead of the BOTTOM border.  This is what happens when you don't unfold the quilt but instead leave it on the hanger, thinking you have it folded LENGTHWISE, when instead you have it folded CROSSWISE.  Sigh.  But, while there will be some resewing happening, I fortunately didn't cut anything! 

Monday, January 21, 2013

Design Wall Monday-Jan 21, 2013

On my design surface today is a top in progress. These modern pinwheels came from some leftover 2 x 5 bricks I cut for this quilt in about, oh, 2005!

 Layout before sewing the rows...
...and with an option for an inner border.  This will be a lap sized quilt but needs to be a bit wider.  I played with putting the lined up little squares between the vertical rows but preferred the block to block setting of the pinwheels.  I have nothing suitable for an outer border in my stash, unfortunately, so will have to shop.  Poor me :)  I'm going to the Road to CA show this weekend so surely can find something there.

All the Picnic blocks are finished.  There are 109 blocks here; I need 108 for my desired 9x12 block quilt.  During the layout I may switch out a few of the brown blocks for more gold ones, as I wanted gold as my secondary color to the green.  Those striped blocks may have to go if they are too distracting!  See more design walls on Judy's Patchwork Times.

Monday, January 7, 2013

Design Wall Monday--Jan 7, 2013

First DWM of 2013--glad I have something to show for it, and thanks to Judy for continuing this well-loved feature.  On my design surface are a multitude of projects.  I've been sewing a LOT.

The pinwheels from scraps are laid out in tablerunner fashion.  The blocks are about 9 inches and a 4 x 3 block layout was just too small to do anything with.  Pondering if I want to make more blocks to play with or call this done and make it a real tablerunner. 

After dragging my feet for a few days--I needed TWO more HSTs of the red and white to complete the center--and had enough of the cream to do so, thankfully.  It will end up being about 40 inches long, I believe, so will be a table mat more than a runner.  I'll use the red for the borders, end triangles, backing and binding.  DD Elaine will get this and is excited about it. 

More scrap fun with red and green.  These will be mug mats for the Shoppe.  I'll do a stitch and turn on these, and use up some batting scraps in the process. 

More scrappy mug mats for the Shoppe.  Heart block pattern is from About.com.  The green calico I'm using for the backing has been in my stash for ages.  It once covered the walls in my daughters' room.  I've used it in so many quilts and will be happy to see the end of it finally!

Since this photo I quilted these four mug mats and bound them with leftover binding from my scrap bin.  I'll hand stitch them down this afternoon while I work at the Shoppe and put them out for sale.  I have a bunch more already cut in pink, and if popular, will make some in red.  See more design walls on Judy's Patchwork Times.

Thursday, January 3, 2013

Piecing and Posing

Once the holidays were concluded and some necessary tasks taken care of (i.e., holiday greetings finally mailed and the tree taken down), I could comfortably return to my regular programming in the sewing room.  So nice to return to piecing again.

A few rows for the chevron tablerunner are complete.  Next time I use the triangle-square cutting die, I think I will use the cut pieces as flying geese wings since this many HSTs was a lot to deal with in 2" finished size.  Of course, that would mean cutting a separate shape for the geese, which sort of defeats the purpose of the HST die cutter, but overall time would still be saved in not having to match quite so many seams while piecing. And I could use the 2.5" die to cut the geese bodies' length anyway! Ha. 

And here we see that quilt MATH has flattened me again.  I should have gone with my first instinct and cut the background shapes at 3.5" wide for these pinwheels, and not 3.25".  However, I did make this sample block first before cutting the rest of my rectangles, so only have to redo ONE block, and not 12. Take THAT, quilt MATH. Ha again.

The Posing part of this post is all Mini.  She walked in from the back door when Erica let her in the other day and promptly hopped in the laundry basket.  Photography was tolerated and she stayed in the basket for at least ten minutes.  Silly cat!

 Last night she came in after dinner and hopped in the basket we throw the used newspapers into.  Again photography was tolerated and she spent about ten minutes in the basket...

...followed by another ten or fifteen minutes in the shirt box.  It was a little more difficult for her to fit in there, but the tissue paper rustled enticingly.  And now, back to sewing!

Wednesday, August 15, 2012

What I'm Working On Wednesday

I have been catching moments of stitching now and again.  Somehow even though I'm working at the office far fewer hours, I'm wasting more of my time when home.

Granted, some of the sewing has been a little fiddly, like the borders and smaller corner blocks on the Garden Pinwheels quilt.  Now contemplating choices for the appliqued vines and leaves, hoping to use something from the stash.   

The Giant Shoo Fly top is all together as well.  My faithful assistant Mini used her tail to hold down the edge of the quilt against the wind while I took this shot.  Thanks, Mini!

This quilt is a wedding gift; the engaged couple printed their own stamps from a photo for the invitation reply.  In the photo he is wearing a sombrero, serape and a fake mustache, and she is wearing skull makeup in the style of Dia de Los Muertes (Mexican Day of the Dead).  Inspired by that, I found this terrific fabric for the backing, with all the right colors, at my local fabric store--an Alexander Henry line called Foklorico; the print is Zocala. It was a bit pricey so I went home and tried finding it online for less.  I did locate a source with a price three dollars a yard cheaper, however it was out of stock until mid September.  Sigh.  So today I went back to the fabric store and paid $10.99 a yard. 

There was a bit of huffing and puffing in my dining room today.  I had to push back the table and chairs and clean the floor in order to lay out the Zig Zag 9 Patch.  There was a lot of bending but relatively little switcheroo involved, though I did have to dash to my sewing machine to make up one more partial block for the bottom edge.  This sideways photo required standing on the couch to try to get it all in!

12 rows all stacked and ready to stitch.  The goal for this UFO of the month is a completed top with borders.  Sounds doable in the next 15 days, doesn't it?

Design Wall Monday--Catching Up

 Design Wall Monday --See more design walls on Judy's Small Quilts and Doll Quilts blog.  I disappeared for awhile, due to computer issu...