Showing posts with label placemats. Show all posts

Monday, September 26, 2022

Design Wall Monday--9/26/2022

Design Wall Monday is here again.  See more design walls on Judy's Small Quilts and Doll Quilts blog. 

Our trip to Palm Springs Sewtopia weekend will be here before we know it.  I looked around the sewing room for a project already in the works and found a box with table runner I adapted from one of Kim Brackett's quilt designs.  This one is called Beachside Bungalow, from the Scrap Basket Beauties book.  


The idea was to use up most of the leftover jelly roll pieces I had bought while shopping for placemat fabrics with daughter Erica a few years ago.  The jelly roll was at JoAnn's fabrics and Erica liked ONE of the fabrics a lot, a pretty mauve.  I used mostly neutrals from stash for those placemat fronts, and some of the brights from the jelly roll for the back.  

Lots of pieces in this project.  I chose one of my favorite Kona neutrals, Shale, a gray-green, to go with all the brighter colors.


Naturally there was an OOPS while cutting.  I had made one A block and was cutting more squares of the Kona for my plan....

..And sliced off a corner at the wrong angle.  Fortunately a rummage through the leftover solid scrap drawer yielded a large enough piece of Kone Shale to recut the square.  Since these photos I have completed sewing up a lot of the A and B Block Parts and filled a project box.  I've got the remaining two-patches paired and at the sewing machine to stitch up.  I will be all ready to layout and sew sew sew. Pondering what second project I will work on....


Saturday, June 18, 2022

Sewing Room Update, Shopping, Quilting

The former family room I use as my sewing room got a much anticipated update. We recently ordered new blinds for most of the bedrooms, which we had put off doing until we finally replaced the single pane, builder grade original windows. For the sewing room however, we wanted to match the shutters we added years ago to the living room, for consistency.  I've had an inexpensive bamboo rollup shade covering the window for a long time.  


The shutter looks so nice and I love being able to control the light better than just an up or down shade.  Since we replaced the former picture window with an actual functional one, I can even catch a breeze :)  Having moved the the tall fat quarter dresser that used to be in the corner next to white desk, the room even looks bigger.  I spent some time at the sewing  machine today.


These tumbler placemats got quilted, simple walking foot with a specialty stitch from the sewing machine menu. I used a simple hack I saw on Instagram when I attached the binding I'd already made.


Sorry I can't give credit for the idea, but I was struck by the "duh, I should have thought of that" simplicity of using a binding clip to keep the quilt sandwich gathered up and out of the way while joining the binding ends.  Clever, right?


Bad nighttime shot! This print was leftover from a backing, as was the binding   A visit to Superbuzzy  today to spend my Mother's Day gift card resulted in a perusal of the clearance bolts for another quilt backing. 

The red cookies recipes print and brown geometric were a great match for the quilt I made last year during Meghan's (Then Came June) Meadowland quiltalong.  I got the Christmas fabric FQ bundle  (We Whisk You a Merry Christmas) as a prize at Sewtopia Seattle.  I'm trying to keep the quilt tops to finished quilt ratio a reasonable amount!  It would be fun to enter into this year's County Fair, which is coming up next month.  Hmmm....

Happy Father's Day to all the dads out there.  We're planning a BBQ with a number of dads--should be fun :)

Sunday, May 8, 2022

Finding More UFOs

There are a lot of new projects I am interested in starting, but the fact is there are too many in boxes clogging up the sewing room that need more attention.  While hubby was golfing on Saturday with our son, I played with fabric. 

 First up, the very small remaining amount of 1930s fabrics are becoming a placemat. 

I used more fabrics and a jelly roll strip for the backing, got it quilted and a binding made since this pic.  It will finish about 13x15.

Next, there were a nice bunch of log cabin blocks leftover from the Log Cabin Loonies project from 2018-18.  Last year, I assembled a top from many others completed, seen HERE  I arranged and sewed these leftovers into a cute topper. My blocks finish at 7.5", an odd size, but  I was using all the 1.5" strips I had on hand. 


I think it turned out cute.  It will get quilting and backing soon too. 


There is only one more Adam's Rib block to sew up after this one, as my Leader-Ender project.  I'll need to find a new one!


Another box held the rows for this quilt, Beach Cottage by Kim Brackett.  I assembled  the rows of these blocks at Sewtopia Seattle in 2019, but never finished putting the top together, though until I found them in the project box, thought I had done so!  They WERE sewn in pairs and it was quick to finish off the final assembly.  My sister claimed the top and I will hand it off to her to quilt, as she wants to put Minky on the back. That should help disguise the every-which-way pressing that happened with this top!

Last, there was a top and backing that have been folded up under the Hoosier cabinet for I can't even say. 


These pieces were left overs from one of the first quilts I ever made for myself, in about 2007-08!  I posted about it HERE.   I have a nice piece of green flannel for the backing of this lap quilt, and pulled all the leftover binding that was red and green. Love to use that up.  

I hope it was a lovely Mother's Day for all who celebrate.  We had a good crowd here for the first time in two years and it was good fun, good food, and included grandsons and their great-grandparents!  How lucky we were. 

Monday, March 29, 2021

Design Wall Monday---Quilting Weekend

Last March Design Wall Monday--just squeaking in under the wire. See more design walls on Judy's Small Quilts and Doll Quilts blog. 

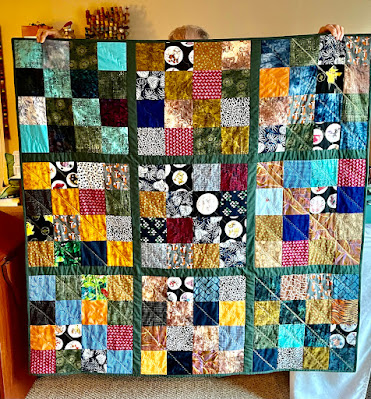
It was an all quilting weekend.  Too many UFOs clogging up the cutting table.  I started with a donated top I'd taken home to quilt well over a year ago; I made the backing early in February, and had batting from the guild.


I got a lot of exercise turning the quilt a hundred times to straight line quilt around the block stripes. It was with great pleasure that I got rid of the odd pale yellow print for the binding--that had been hanging around in the stash for ages.  


Pieced backing cleared some more odds and ends from stash. It is ready to donate.


I liked how the heart turned out.  The jelly roll used in the top was from an old line from 3 Sisters called Sanctuary.  I made a quilt from that line for my cousin many years ago, and used up leftovers from that for another quilt I gave away last year.  So soft and pretty. 

The rest of the quilting jobs were wavy line all the way, so much faster and easier, but I didn't feel it suited the heart quilt. 

Modern placemat from leftover trial blocks and backing. 

It turned out a bit freeform from the back, lol.  Next, a quilt top I made from fabrics purchased on my trip to Queensland, Australia in 2009 to visit my friend Sue.


The backing and binding were all ready to go.


This weird print I bought on clearance suits pretty well. 


Wavy line quilting is so fast and easy, especially since I don't pin the quilt sandwich center, just layer and smooth on both sides, then fold it up and let it rest for a bit, a la Dory Cary.  I have mentioned this method she taught at a guild presentation, but can find no info about it on her website, Orange Dot Quilts, sadly.  I only put pins in the top's corners to keep them from flipping over.  There are a lot more finished tops that need to be quilted and some of them will get this treatment!

Saturday, August 3, 2019

County Fair Results

My husband and I spent a few hours at the County Fair on Thursday night, mostly to see how my entries did, but also for the music, food, people watching, and fun.  We rode the free shuttle in from a satellite lot, saving us $15 parking fee at the Fairgrounds.   The Home Arts building was lightly populated so we were easily able to hunt for my quilts. 

A lovely red ribbon on the Falling Charms quilt.  This photo isn't the best!

A blue one on the ModZ block baby quilt.

Red for the embroidered center small quilt.


The Christmas Tree skirt got a 1st ribbon...

..as did the Round Robin Star quilt.  The lighting showed the spiral quilting well. 

My version of the Humble Quilts blog Sajou quiltalong mini earned a 3rd place.

The horrible lighting aside, the placemats showed another blue ribbon--even if they did have the backs facing up, lol.  Adding up, I was awarded 4 first, 2 second, and one 3rd place.  Lucky me!

My sister did very well on her quilts too. 
She earned a 2nd place ribbon on this quilt she was reluctant to enter---so many people love the DreamBig panel and she had fun quilting this on her longarm but didn't think it was show-worthy.  I told her to put it in anyway!

Kathy's Row Robin from Guild also did well.  I made the bottom row of this quilt top and love what Kathy did with all the quilting, so fun.  

Her shadowed squares also got a 3rd place.  This quilt is destined for a family member, I believe.  Again, Kathy did the quilting--love the texture.  

Another 3rd place on a modern quilt she made and quilted.  Love it.


Very poor photo of an H Bag Kathy made.  She has made dozens of these by now!  She had a couple other entries I did not get photos of.   There were a few fellow guild members who entered quilts but overall the number of quilts and other Home Arts categories gets smaller and smaller each year, which saddens me.  While I've been lucky each year with my entries, even if I don't win any ribbons, I love to see the work other crafters make and enjoy all the variety.

Monday, July 22, 2019

Design Wall Monday--Fair Entries

It's Design Wall Monday.  I've been busy in the sewing room finishing up entries for our County Fair, so my Design Wall is now empty.  

Some projects I entered were already in progress and one quilt I borrowed back from the new owner.  A brand new project also jumped into the mix.  I finished an embroidery some months ago and decided to make a quilt with it.  I have a book by Pat Sloan that is all about novelty fabrics and includes what to do with panels.  I had some trouble with the math but the worst part of the whole process was when I could not find the shank attachment for my sewing machine feet, having taken off the walking foot.  It took easily 15 minutes of searching before I finally checked the box the walking foot came in, and there it was! 


I pulled the border fabrics from stash.  After auditioning numerous binding options, I picked an Alison Glass fat quarter, mostly because it was wide enough to help me enlarge the backing as well as making the binding.  

Very simple quilting and some corner triangles for hanging.    I'll enjoy putting this up on a wall when it returns from the Fair. 


 Another finish was making and adding binding to this baby quilt made from ModZ blocks from the Modern Quilt Guild. Luckily I had three strips of white fabric and a couple of small sections of green and love the way this turned out.
Fat quarter backing from stash.  This quilt may end up donated to guild if it isn't claimed by a family member!.

This Christmas Tree Skirt was started months ago and had reached the "needs binding made" stage.  I had left the quilted panel on the floor of my sewing room and the blasted cat peed on it! I had not cut out the center or panel opening and was able to put it through a soak and gentle washing, then I ironed it flat again to apply the binding.  I used Bonnie Hunter's method for figuring yardage for the bias binding.  However, I wanted to start with longer strips so upsized the width of the yardage to about 20 inches to get nice long pieces to join.  It was quite a struggle to get that bias binding on, I tell you, especially around the center! 


The plaid back makes the skirt reversible.  I only added one tie of the bias binding, but may add more.  The placemats for daughter Erica also got finished.  Naturally I had to go out and buy thread to match the purple binding.  I decided to wash said backing and was very glad I did!

 Look at all that dye!  This could have been a disaster on the light fabrics on the front.


Erica was very excited to know the placemats were finished  and was not happy when I told her I was holding some back for the Fair. "You can have two", she said, which I "ditto-ed" right back at her, with the caveat that possession is 9/10ths of the law, ha ha.  In the end, I dropped off two plaemats at her house and kept  the rest.  When turning in the placemats at the Fair, there was a needle and thread on one placemat that needed a corner sewn up, too funny!

The other three entries were the Falling Charms quilt I borrowed back,the mediallon quiltalong from guild that I spiral quilted some months ago, and the Sajou quiltalong quilt from Humble Quilts. 


I was the last person turning in quilting projects at the Fairgrounds today, luckily the head of the department and a local quilt teacher helped me to get them all checked in. The lighting is just awful in the building, so I wanted to document all my different quilts to date. 

See more Design Walls on Judy's Small Quilts and Doll Quilts blog.

Monday, July 8, 2019

Design Wall Monday--Placemats

Design Wall Monday rolls around again....Off my design wall are the placemats for daughter Erica.  She had picked out some stash neutrals to go with the one mauve print in a jelly roll she liked. There were enough jelly roll strips for the mauve to bookend the neutrals.


I assembled all 6 placemat front pieces in one sweatshop sewing session!  My comment to Erica was that these looked like ice cream :)  I made the backs from the rest of the jelly roll pieces; Erica left the layout and fabric choices to me so I changed the orientation to horizontal. 

It was easiest to sandwich and quilt them in batches of two, since she wanted them to be all alike.  I used specialty quilting stitches on my machine, with cream thread.   In total there were five different stitches used; I kept track of the stitch number and setting information on an index card to ensure the placemats were uniform. 

Fortunately this was the only part of the job that involved ripping.  There may have been colorful euphemisms that accompanied the unsewing.  Ahem. 

All quilted now--showing three backs and three fronts.  I've got them trimmed to size and the binding fabric is being prepped. I'll apply the binding to the back and bring it to the front for a nice machine stitched finish.  Hope to have these done by next weekend--before the customer complaints roll in!

See more design walls on Judy's Small Quilts and Doll Quilts.

Tuesday, September 4, 2018

Three for September Report

An update on this experiment, working on one project for three days and then switching to another every three days through the month of September.  I started with some placemats that were in progress and am happy to say I finished them on the third day.  In the 11th hour, but finished!  The green photographs very dull but is actually a brighter shade. 

I had just barely enough of the aqua floral binding for the four placemats.  In fact, I was short until I remembered to look in the 2.5" precut scrap drawer and found a 12" piece to add to finish the last placemat!

The back is finished to make them reversible.  My newlywed nephew and his wife hopefully will enjoy using these placemats in their apartment.  I got their address today as part of the tasks associated with the project :)

I perused the remaining list of 9 WIPs and decided on an oldie but goodie for the next three days.  It appears this poor quilt has not made an appearance on the blog since 2012.  Sheesh. It has been aging a long while in the coat closet.

I made these pinwheels with cutoffs from the Rick Rack Road quilt, way back in 2011, and made the big HSTs to form diagonal stripes.  The borders have been awaiting a detail of leaves ever since.  I have had a pile of green fabrics set aside for years, and plan to back them with fusible web and use my GO! cutter to die cut the leaves, then use a fancy stitch around the edges after fusing them on, like so:


I saw this detail on a quilt at a local guild show in 2013 and liked the impression of a vine without having to mess with bias strips.  Getting the fabrics prepped and cut into leaves is the main task.  Since I work the next three days it may be all that gets done, and I will be happy with that. 

Design Wall Monday--Catching Up

 Design Wall Monday --See more design walls on Judy's Small Quilts and Doll Quilts blog.  I disappeared for awhile, due to computer issu...