Showing posts with label scraps. Show all posts

Monday, April 10, 2023

Design Wall Monday--Plaidish2 Progress

 Design Wall Monday--see more design wall beauties on Judy's Small Quilts and Doll Quilts blog. 

I got the final two rows attached to the Plaidish2 quilt top.  


This is a big quilt already, and will grow another few inches in each direction after the outer borders are added.  I spent a couple of hours cutting up colors from my precut 2.5" scrap drawer, which is completely full!  The outer border is assembled in groupings, so lots of mixing and matching will be happening.  


I love using my rotating Omnigrid mat and a small rotary cutter for trimming jobs like this.  


Caught a couple of crows that landed in the backyard--very unusual to see them here.  I watch flocks of them head inland almost every evening, but they don't often stop!  Our hills and lawns are still very green from all the wet weather these past couple of months, though the snow on the local mountains has melted. My favorite volunteer flowers did bloom recently, after a several year absence due to the drought. 


This patch is below the bridge I pass over every day on my way to work.  So pretty. 


I'd say these flower spikes were about 18-20" tall.  Lots of poppies in bloom in different areas, too, including my small backyard patch.  The garden centers have been crowded with folks putting in spring plantings.  I have avoided going on the weekends but plan to get some flowers soon. 

Saturday, April 8, 2023

Sewing, Quilting, Binding

I've spent a lot of time recently sewing, quilting and binding--If only those activities worked off more calories!  
First up, a baby quilt that has been waiting for the already-made binding to be attached and finished. 


Entirely from stash, with a lot of pink fat quarters pulled from the fat quarter drawer. Many of the black and white prints were leftover from the baby quilt I made our now 7 year old grandson. 


The monkey print was also from that baby quilt.  The gray print was leftover from another quilt back as well. Using it up!  I had the measuring tape print awhile too--I thought it was fun for a baby quilt. 


The "Make the Connection" charity quilt was also finished with a white print binding, but this pic is only of the finished top.  Free pattern on American Patchwork and Quilting magazine website, by Jo Kramer. My sister and I are rejoining our local Modern guild and I will donate these two. 

While looking for something else in the Hoosier Cabinet, I pulled out the project box with the Plaidish2 blocks.  The A and B block components were all finished last Fall and I had  sewn together  just a couple of rows.  I think this got abandoned for Sewtopia prep. 


A and B block sewn together. 


As of dinnertime tonight, all these rows are together.  Two more rows to add before the center is done.  I did not cut any of the outer row C blocks yet, wanting to avoid too many repeat fabrics.  The Plaidish and Plaidish2 patterns are free on Kitchen Table Quilting. She has a lot of Freebie tutorial patterns. 

Next project to cut and sew up is a baby quilt for our next grandson, due in a couple of months.  I have a plan and fabric selected.  More on that later...

Saturday, April 1, 2023

Bookshelf Quilt Top is Done

So happy to report that the Bookshelf Quilt in progress for nearly a year is a completed TOP!  I really wanted to have it finished by March 31, but April 1 is not a bad second:)  I used the Fabric at Work Bookshelf Quilt pattern as my basic guide for my bookshelf's construction. The background fabric I was waiting for arrived  pretty quickly. 


This is Carmen, by Nancy Gere, from Windham Fabrics.  I liked the stylized print late-1800's print and thought it would make good "wallpaper" behind the bookshelf.  I started with the feet. 


My idea sketch for the feet turned out to be too small, but upon enlarging it, I ran into the hardest kind of math--QUILT MATH!  Eventually I found myself sewing a 30 degree angle and nearly had an aneurysm trying to attach the opposite foot piece and make it come out the right size and width! Finally the bottom of the bookshelf was complete. 

I was really happy with the contrast of the print to the solid brown of the bookshelf. Next was more design decision-making for the bookshelf 's top. 


I had cut WOF strips of the brown solid in two widths, just to start with.  I knew I wanted to have a crown at the top of the bookshelf so there was a lot of trial and redesign for the height and configuration. For reference, the bottom shelves are 12" tall, the top shelf is about 9", and the bottom drawers about 9" as well. 


Here I was confusing myself by trying to add a 45 degree angle to the crown, but this was entirely wrong and way too heavy looking. 


That's much better.  It was quite a struggle to get to this point!  I ended up cutting the crown pieces down and sewing two different strips of background on the ends to form the angle I wanted, without making it too heavy-looking. 


I'm certain this could have been more simplified by appliqueing the ends of the crown onto the background, but overall I think it works just fine--the print is busy enough. 


Finally, today all the border pieces were added and the top completed!  The drawers will get two knobs each at some point in the finishing process.  I have yardage with a white and black print from stash to use as backing, and the binding will be solid black. On to the next step...

Monday, February 27, 2023

Design Wall Monday--Bookshelf Quilt

 Design Wall Monday--see more great design walls on Judy's Small Quilts and Doll Quilts blog. 

I gave myself a month-end deadline with the Bookshelf Quilt for my niece, Emma, that has been hogging the design wall for months. Real life interruptions will likely push back a finish, but progress is being made after a long hiatus. 


Sandwiched books between the brass trimmed bookends--and another grouping of three books are stitched together now.  Directions are from the Fabric at Work Bookshelf Quilt Pattern.  

I also made a start on another grouping.


I added the toile black and white strip to one book spine.  Lots more decisions to make, but I am having fun playing in the scrap drawers, as usual!  Next task is to make some horizontal book stacks to support some feline friends.


I did buttonhole stitch down the tails but don't have a photo of that.  These cats are about 7 inches tall and need probably both more black background at the top as well as some book spines under them. 

There are then a couple of embroidery pieces that need enlarging/framing for the bookshelves.  Good to be working on this again.

Monday, February 20, 2023

Design Wall Monday--Chocolate and Cheddar

 Design Wall Monday--see more great projects on Judy's Small Quilts and Doll Quilts blog. 

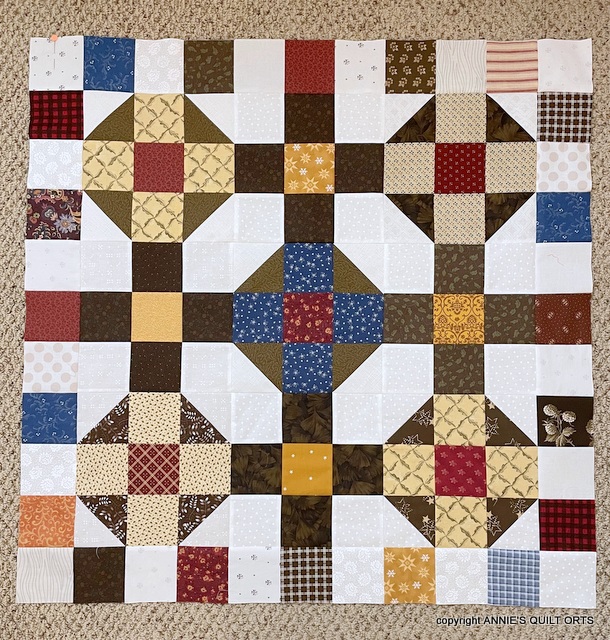
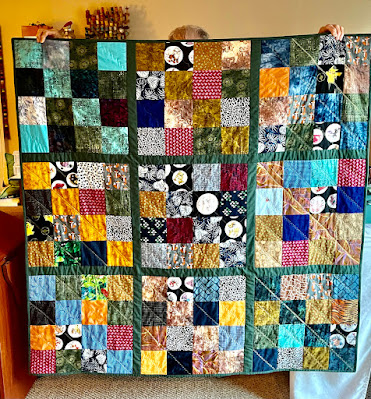
I have a finished quilt top to share--I'm now calling this Chocolate and Cheddar.  I had a lot of fun making up this quilt along the way, starting with a pile of  precut 3.5" scrap squares.  Everything came from stash, and I continued the 3.5" measurement for all the additional rounds. I ended up making a total of four blue background stars to use for each corner.  The top measures 45" square, a good size for a wall quilt, and I am stopping here. 


A backing will be cobbled together from stash--I sure have plenty of fabric to choose from.  This scrappy foray  was a good distraction from recent real life concerns. 

My sister was the victim of a very bad rollover car accident on the freeway last month and suffered a neck, sternum, and clavicle fracture, but fortunately no brain injury. She was in the ICU for four days and has been in a hard cervical collar since the accident. She worked very hard in physical rehab at a local hospital and is doing very well, but has limitations.  She is staying with us temporarily until she is cleared to remove the collar by a specialist and can cope on her own. I took her to the harbor mouth today for some outdoor change of scenery.


It was a pretty calm day and lots of folks were enjoying the sun and sand. There was even a seal swimming in the harbor, but I didn't get a very good picture. Kathy motored about slowly but was glad to be out of the house for a bit.


Lots of beach visitors on the South Jetty side, too.  

Now I really must get back to the Bookshelf Quilt top I planned to work on this month!

Sunday, February 12, 2023

Mini Blocks and Scenery

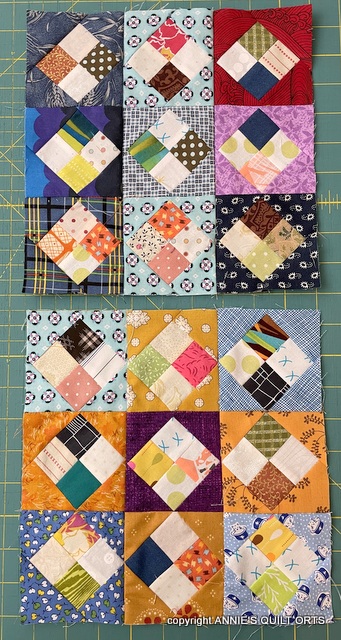
Winter in SoCal is mild, but it has been on the cold side, for us, with 60 degree days and lows in the 40s at night.  It's always a great time to sew, but feels even more appropriate to be making quilts. I've been making star blocks to add to the 3.5" scrappy squares quilt top.


These are 3.5" finished--I haven't worked on such tiny pieces in awhile, and they can be very fussy to get straight.  The bottom right one had a little nip and tuck surgery after this pic as the center cheddar sure didn't look square.  

The smallest Bloc-Loc tool is very helpful for the sliver trimming the little HSTs. Mostly I used 1.75" strips to make the pieces and trimmed them to 1.5". Churn Dash and Friendship stars have the same pieces so I am making some of both.  I will be adding a narrow stop border to the quilt top--maybe in cheddar, but more likely brown--and then will decide how many stars to use as an accent.

Speaking of accent, we had some snow on our Topa Topa mountains recently.  It didn't last long, but sure was pretty. 


Sure looked pretty!


I love winter sunsets too :)


Saturday, February 4, 2023

Mats and Scrappy Piecing

 I've continued to work on the mats I showed last time.  I'm having a great time playing with these scrappy smalls. 


This skinny mini I ditch quilted and gave to my manicurist friend along with the larger mat I cut it from. Stacy liked them both :)

I was able to use batting cuttoffs for all the mats, though I did have to piece some together to bring them up to size.


 I found that using  slightly oversized backing and batting worked best for me in stitching  the layers.  The 1/4" seam didn't try to curl or jam at the corners and the excess was easily trimmed with scissors before turning the sandwich right-side out. 

There was more design work on the scrappy churn dash and cross block top.  More 3.5" squares were sewn up and added all around. 


I'm liking the shapes and colors of this scrappy squirrel. The top measures about 33 inches square at this point.  I'm still thinking about making small star blocks, perhaps just for the corners, and considering a stop border between the patchwork and stars.  I cruised Pinterest for some border ideas, which was fun. A  stop at JoAnn's Fabric resulted in some bargain remnant  white background pieces. I was there primarily to pick up some easy-threading needles, but couldn't pass up the 50% off  yardage price. One piece was an entire yard, whoop whoop!

Getting back to the bookshelf quilt for my niece, which has been on the design wall for months, is February's goal. Since it is a short month, design decision-making needs to be ramped up. I've been stalled for too long!

Thursday, January 26, 2023

Mats Galore from the Scrap Drawer

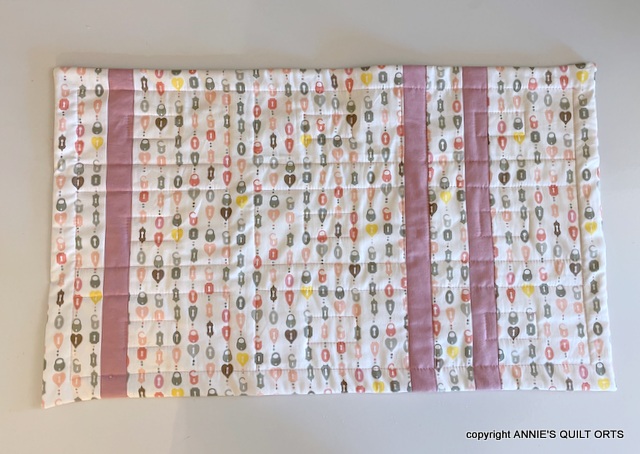
Lots more singleton blocks, bits and bobs, fat quarter pieces and precut strips have been occupying my stitching time. 


The blocks in the top row were leftover Easy Breezy blocks (Bonnie Hunter free pattern). Extra Easy Breezy pieces made up the long skinny on the end. The other long skinny with the pink and gray was a cuttoff from the most recent table mat I made my friend.  I made the scrappy square-in-square tops some time back.  All got 1.5" borders, mostly from the fat quarter dresser for a faux binding.

Some 3" squares also got sewn up into a 16 patch.  They don't fit into my precut scrap system so this is a great  way to use them up.  I've since paired up all the patchwork pieces with backing from the fat quarter dresser. 


There happened to be a perfect sized piece of batting already on the cutting table for these two mats.  Simple ditch-stitching for both the blocks and a faux binding finish.  Just a few hand stitches to close the opening and call them done!  Perhaps I will find a place to sell these,  I can't keep them all!

Saturday, January 21, 2023

Color and Pattern Play

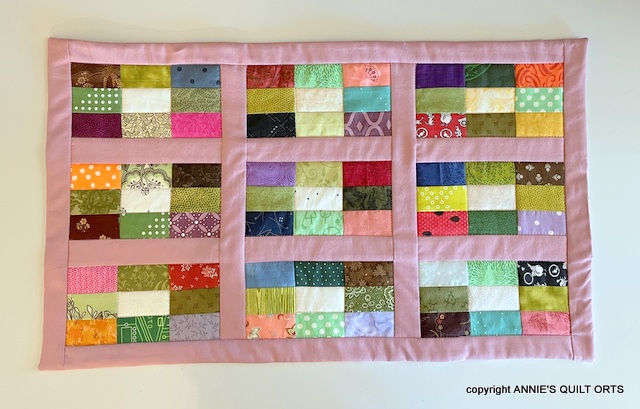
Playing with color and pattern is so relaxing and fun for me--it doesn't always lead to a finish, but pieces and parts get saved to play with on another day. I wanted to make a little something for my manicurist friend, Stacy, for her birthday month. I pulled out a little top I made in September from  leftovers from pre-cutting my sister-in-law's mauve solid for her Sewtopia project. 


The scrappy rectangles each have in common light centers and four green rectangles. These were 2.5x2" scraps.  A fat quarter from the stash dresser was brought up to size with some more mauve strips from SIL Laura's scraps. I layered the batting, the backing right side up and the top right side down. I used 1/4" seam and left an opening to stitch and turn.  This is the faux binding method from Crafty Staci again, but  I cut my strips 1.5" wide for this bigger quilted mat (Crafty Staci used this method for her coaster tutorial with 1" cut strips and added a layer of Insulbrite as well).


Stitch in the ditch quilting including around all the mauve strips, and the light center rectangles. 


My ladder stitching was better this time but my corners are kinda pointy!  Oh well. 


It is two sided, in case the front is too loud sometimes, haha!  


The two mini quilts got their binding finished this week, too. It was rainy and cloudy and windy this week, we are over-saturated and have had a lot of damage from high surf along our coast. Today, though, was very sunshiny. 


Some palm trees of the neighbor's were getting trimmed today.  That's probably 40-50 feet off the ground kind of work!  We really wish that a closer back-fence neighbor would trim their huge Pepper Trees that block our view of the mountains...Oh well!  

Thursday, January 12, 2023

Backings and Bindings Continue

 In the neverending queue of tops that need to be turned into quilts, I chose two small ones to work on. They are fairly young projects in my TBQ pile.  


I had already chosen the solid aqua--I think this is Kona Pool, but don't quote me. The binding is made from a fat quarter.  Always patting myself on the back when the stash provides, lol!


Leftover backing cutoffs provided the fabric for Winding Roads mini.  These patterns are by Heather Mulder Peterson from her booklet Mini Charms 2. I made the basket block last year from this booklet.  It is still gracing the wall but I will find a backing/binding for it too. It looks yellowish here but is white IRL.


Okay, off to get ready for work!

Tuesday, January 3, 2023

Small Quilts Under The Needle

I finished the binding on the red and green mini quilt.  It did not take very long to hand stitch the binding. This one I'm keeping :)


I don't think I'll ever tire of red and green quilts!  Having no specific larger quilt to piece at the moment, I rummaged in the Hoosier cabinet for more smalls to play with. I had made myself one of the stitch-and-turn mug mats/hot pads with the faux binding technique from Crafty Staci's website. 


I used the same fabric for the backing as the faux binding and think it reinforced the binding look. 


I previously made a doll quilt from leftover HST pieces and a mini charm pack, and decided to try the faux binding on this size as well. 


My thought is to cut a backing piece the size of the unfinished top and add faux binding strips to it. I'd complete the project by layering with batting, stitching and turning the quilt, then adding quilting.  It should be much easier to stitch and turn this larger patchwork than the mug mats!

If the process is not too painful, I'll try it with these colorful minis from the unfinished block box.


The never-empty scrap drawers keep my mind  twirling!


Design Wall Monday--Catching Up

 Design Wall Monday --See more design walls on Judy's Small Quilts and Doll Quilts blog.  I disappeared for awhile, due to computer issu...